HMI lamps: how to use it
How to install and use HMI SE and DE lamps
HMI SE (SINGLE-ENDED) and DE (DOUBLE-ENDED) LAMPS
In this news we will see some suggestions on how to install and use HMI lamps, both in the SE (Single-Ended) then in DE (Double-Ended) version.
How to install lamps
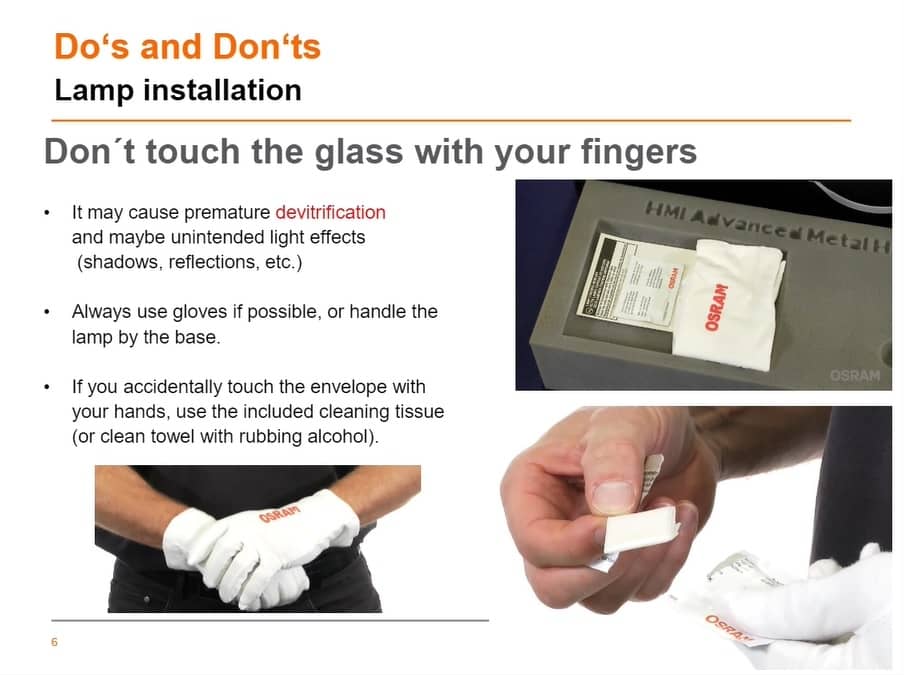
- Handle the lamp using clean gloves, if not included in the lamp package, to prevent dirt or grease from settlings, shortening the lamp life. In case of contact, clean the glass with the tissue included in the package or with a tissue soaked in alcohol.

- Before inserting the lamp into the projector, check that the projector is in good condition and that the ballast is correct. Also check the lamp to verify that there are no marks on the socket such as condensation or rust that could compromise the electrical connection and lead to premature failure of the lamp. It is usually recommended to replace the lampholder every 4-7 lamp changes, but we always recommend to check the actual conditions before use.
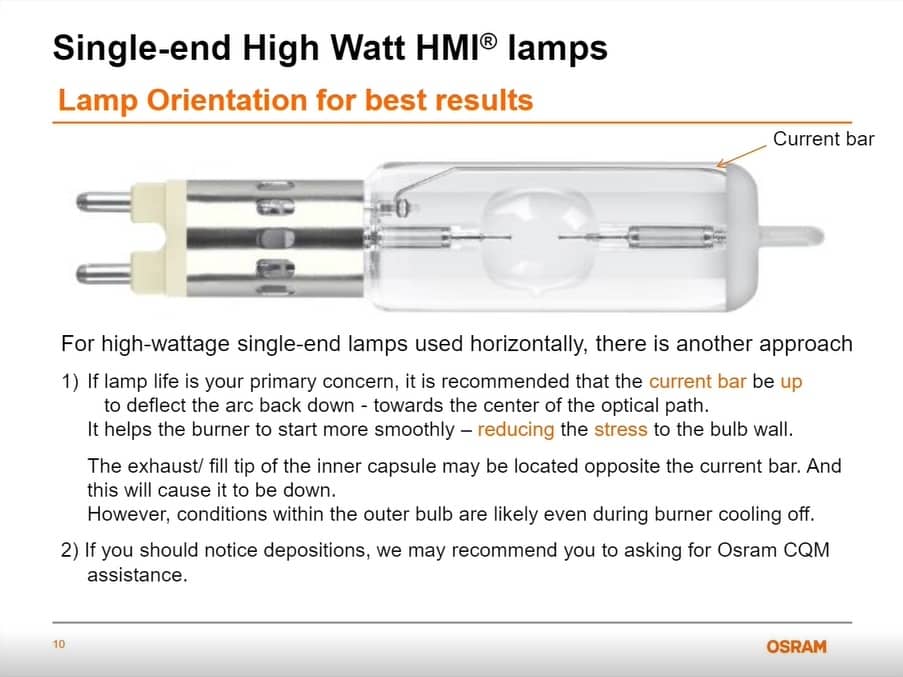
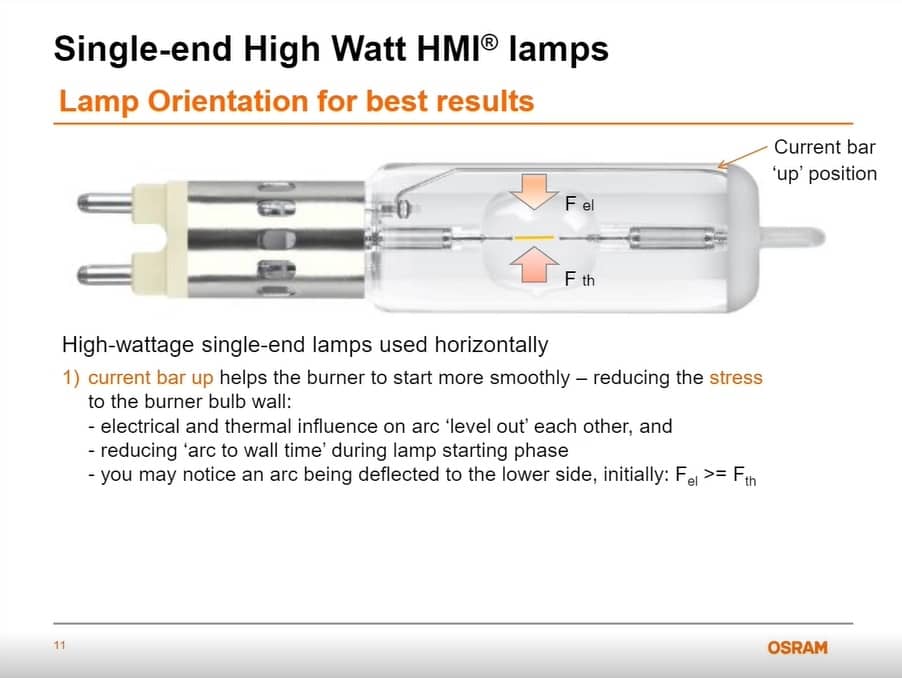
- To ensure optimal performance on the SE (singleEnded) lamp, make sure that the current bar is oriented upwards so as to allow easier ignition, causing less stress on the lamp wall. This means that the exhaust tip will be facing down. In this case, the electrical and thermal influence on the arc self-regulate each other by reducing the amplitude of the arc in the ignition phase. An incorrect position involves greater difficulties in the ignition phase as both the electrical and thermal influences “push” in the same direction, pushing the arc upwards, also increasing the risk of premature devetrification of the lamp, deformations on the bulb of the lamp up to arrive at sudden brakes. These effects become more noticeable in dim mode. In case of DE (Double-Ended) lamps, the discharge tip of the lamp should be upwards oriented if possible to prevent the waste elements from collecting in the coldest point when the lamp cools down.
- When you insert the lamp pay atention not to touch the projector, and once inserted check it is completely fixed in the lampholder. Only at this time you can block the lamp in the projector.
- Check that the ballast is on “maximum power” before turn it on. If you don't do it the arc would tend to bend risking touching the wall of the bulb with the consequences we saw earlier. For the same reason it is important to check that you have selected the correct frequency of use (in case it is possible to change it) in order to ensure greater arc stability.


To do and not to do
- Don't touch the lamp with your fingers. It can cause devetrification and unpleasant and unwanted lighting efgfects (shadows, reflections, etc). We suggest the use of gloves, if possible, and to handle the lamp from the base.
- Try to grip the lamp in the space between glass and base so that you can have a better control on the glass avoiding the "lever" effect.
- Give the lamp the possibility to join its maximum temperature before turning off the projector so that you can avoid elettrodes waste that can influence the lifetime of the lamp reducing it.
- Don't move the lamp inside the projector. When it isn't inside the project be sure it will be stocked and moved in its origianl OSRAM packaging.
- Do not install lamps with visible damages like protrusions, blackening, strong devetrification, broken rods, free internal burns even if still functioning.
- Don't install lamps with a higher power than the one of the projector checking also that the power supply voltage used is correct. An incorrect use could lead to irreversible degradation of the electrodes with consequences on the performance of the lamp and on the color temperature.
- Don't use lamps beyond the duration declared by the manufacturer.
- Don't use lamps with different frequencies than the standard ones as they could cause an unstable arc which will cause an unstable light or even irreversible damage to the lamp.
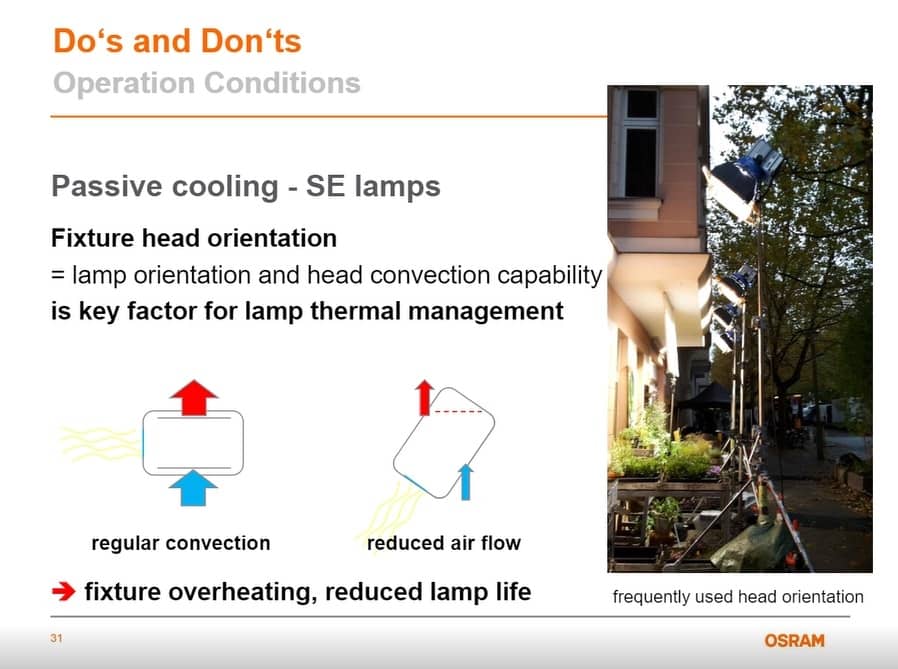
It is also good to pay attention to the orientation of the headlights. The thermal factor heavily affects the life of the lamp: a reduction of the air can causes overheating which will result in a reduction in the lifetime of the lamp (typically overheating occurs when the orientation of the projectors is not parallel to the ground).
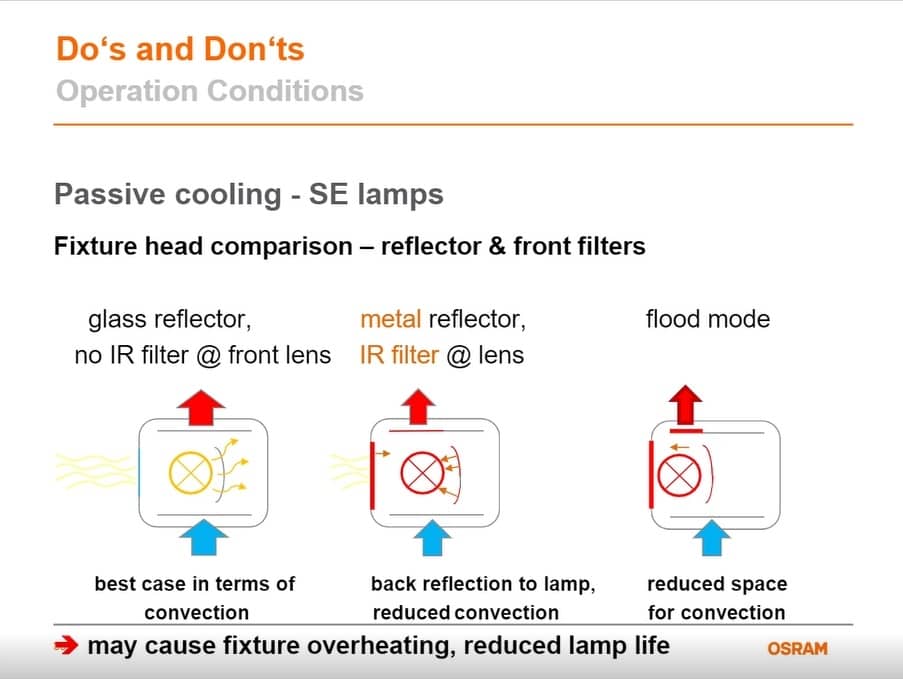
Also the type of reflector and the use of any filters affect the dissipation of heat and conequently the life of the lamp. For example, a reflector made of glass allows a greater heat dissipation and if there isn't a IR filter allows for an optimal situation of use. If we use a metal reflector, we will have instead a reflection of the heat on the lamp. If we use also a IR filter on the front lens (which also returns, even if minimally, some heat on the lamp) we will reduce the coming out of the hot hair with consequent overheating.
We can have the same results also if we talk about projector with adjustable mode: if we reduce the space between the lamp and the lens, we will reduce the quantity of air that will go out with overheating inside the projector and consequently a reduction in the lifetime of the lamp.
Pay attention to overheating signs: discoloration of the base and oxidation of metal parts, screws and rusty pins, premature divitrification of the lamp and blackened color of the bulb.


Troubleshooting
What can affect the color temperature? It depends on the part involved:
- Projector: in particular the use of lenses, reflectors or filters, the orientation of the head, the position of the lamp, the internal convection system;
- Ballast: frequency used, type (magnetic or electronic: we recommend the use of the electronic one for operation with frequency which are higher than 50Hz and in general for all the latest generation lamps because it has been noticed that it gives less problems), dimming, lenght of the cable (too long);
- Lamp: any malformation of the bulb (due to misalignments of the focal reflector or surface damaged by incorrect handling or insufficient convection), devitrification of the quartz, blackenning / burning, burnt or damaged electrodes, hours of work carried out.
In case of doubt we always suggest to make a test: compare two lamps on two projectors and then invert them. Does the problem remain with the lamp or the projector?
Which can be the causes of air infiltration into the bulb?
- Thermal: oxidation of the lead wire may have broken the gasket
- Handling: damage in the coupling area with consequent micro fractures in the affected area
- Breakage: breakage or damage in the part with which the lamp hooks to the base
- End of life: wear of the pinch sealing of the pins
When arrives the end of life of a lamp?
Usually each lamp has an average rated life that is calculated by the manufacturer on the basis of tests under ideal conditions. In case of wrong use of the lamp, the lifetime can be shorter. Anyway there are some signs that we can see by observing the lamp to understand if we have reached the "end of life" point:
- Quartz devitrification/recrystallization: typical signs are changes in the colour temperature and the opacification of the lamp. It is caused by an increase in the internal temperature.To avoid safety problems it is advisable to replace the lamp even if it still works;
- Blackening of the lamp: caused by the tungsten deposit following uncompleted ignition cycles;
- State of the electrodes: inside the lamp you can see burnt electrodes to indicate return burns or there are growths on the electrodes. The lamp should be replaces as soon as possible to avoid damage. Possible causes: ignition cycles not completed correctly or too sudden forced cooling;
- State of the fixing point: a blackened or damaged fixing is a sign of the end of life of the lamp or of overheating of the same with consequences on premature exhaustion. We recommend not to repair it by yourself because you may cause problems while using the lamp.


The causes that can lead to oxidation or damage to the cables and the lampholder are generally incorrect positioninf of the cables, a too high current voltage or high temperature inside the projector.


Pay safely with

Fast delivery with


More information?
For commercial and technical information related to our products please contact us!

2024 © Amlux s.r.l.
Tax code. and Vat: 01906840200 - Share capital: 11.000 € i.v.
ITALIAN R. IMPRESE: 01906840200 - ITALIAN R.E.A.: MN 208408 - Mecc.: MN 018068
R.A.E.E.: IT08020000002339 - Via Belgio, 11/13 - 46042 Castel Goffredo (MN), Italy